|
|
Post by garydavis on Feb 18, 2016 13:40:29 GMT -8
Hey Bruce....I don't remember doing a tutorial on decanting. But...The way I Decant is....The spray cans with the remove-able spray tips is the only ones' that this will work with. I bought a couple of cans of spray Brake cleaner. They come with a tip that has a red tube that fits in the end. This setup can be exchanged for the tip on the paint can. I put on a pair of latex gloves...Grab a sheet of paper towel(for the back spray that comes out of the bottle that your going to be spraying into)...grab a GOOD paint container with a good seal-able lid..I use Glass(easy to see the paint). Tilt the open container a tad while holding it at the top with the paper towel as a blocker. Slide the red tube into the glass container with the paper towel laying over the opening(to keep most of the over spray at a minimum) and start spraying. I usually aim for the side wall as this will let the container fill up a little more before it starts to spatter to much. Hope this helps you Bruce....
|
|
|
|
Post by dogfish7 on Feb 19, 2016 6:30:21 GMT -8
Thanks Gary. I guess there is no non-messy way to do it.
|
|
|
|
Post by dogfish7 on Feb 19, 2016 12:22:40 GMT -8
Remember we talked about Steve Ramsey a few days ago. He passed away last night in a Nursing Home in Skagit. Sorry I don't have a better pic right now. Performance Modeling Club will be having there Show next week end on the 28 th.
|
|
|
|
Post by garydavis on Feb 23, 2016 19:33:17 GMT -8
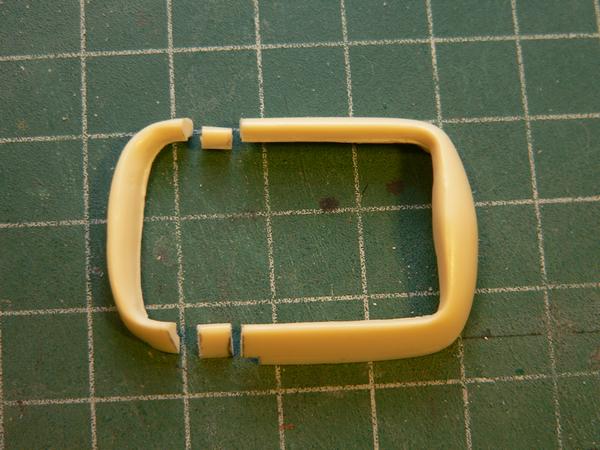
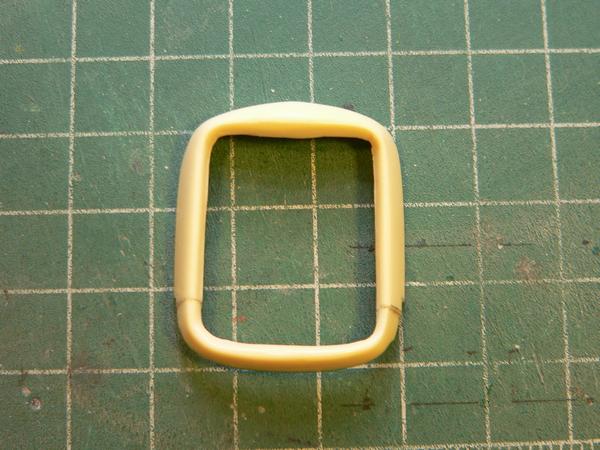
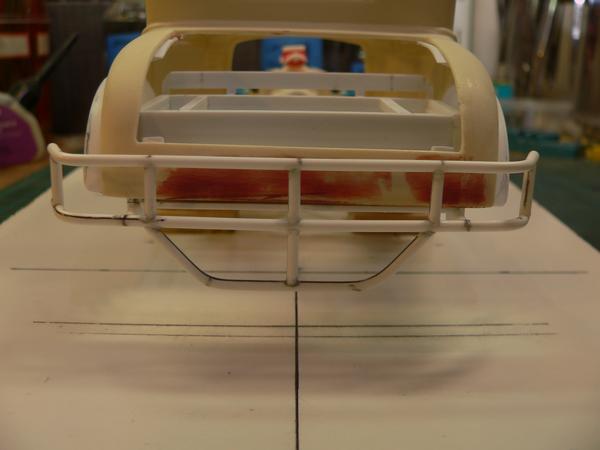
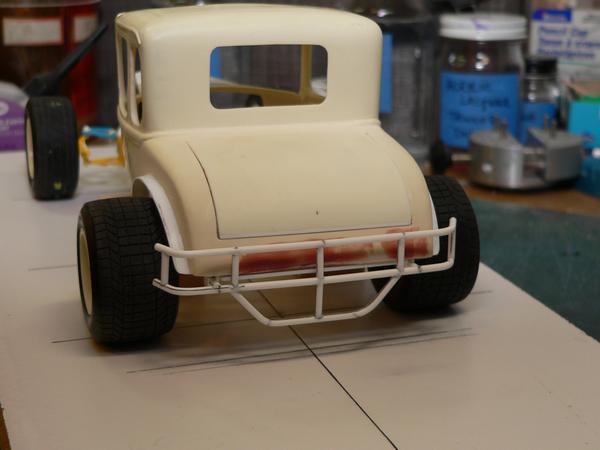
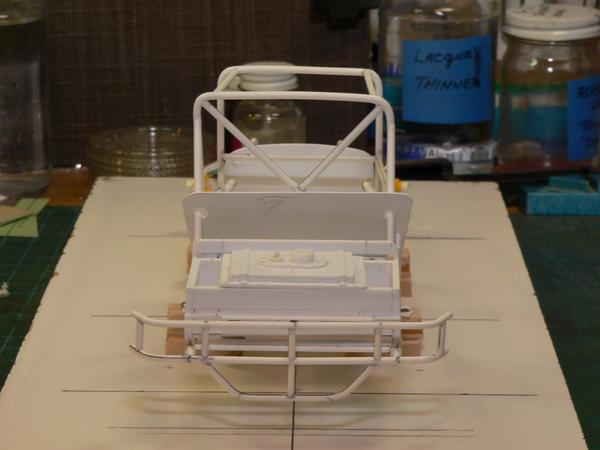
Very SAD indeed Bruce. Jim Twitchell also told me about him. Jim's also in the Performance Club. Here's an update for this guy....I did take a few scale inches out of the Grill surround. It sets higher and just in line with the front bars.
The grill area....
The front push bars,cowcatcher,chrome horn or what ever it's called in your area :-D ...was fabbed and is in mockup...It's pinned so it can be removed for painting and then re-attached afterwords....
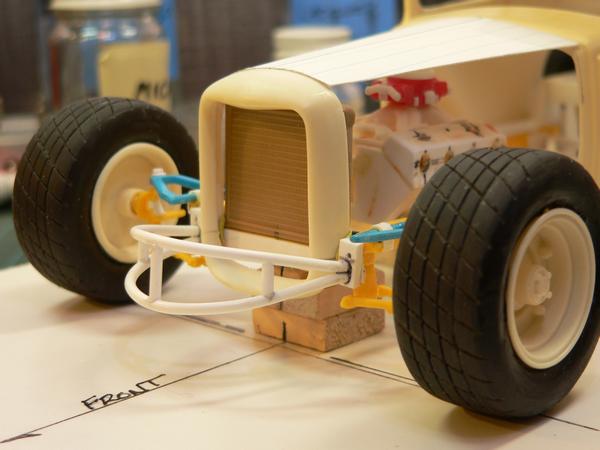
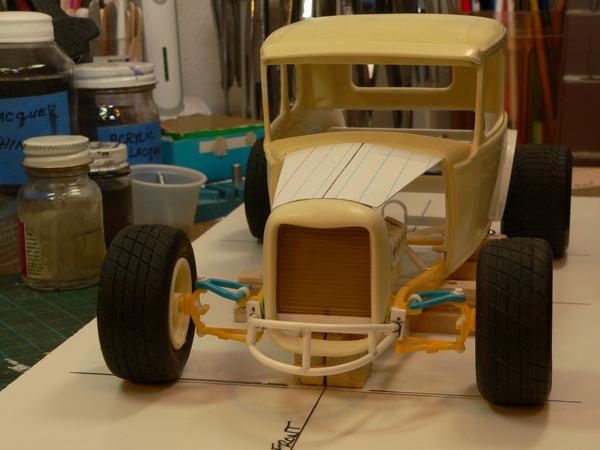
The rear bars were also fabbed and are in mockup the same way(pinned)...
With that work completed...I can NOW concentrate on the interior floor and bar work...Thanks for stop'in by and look'in around...
|
|
|
|
Post by dogfish7 on Feb 24, 2016 11:46:48 GMT -8
Excellent progress Gary.
|
|
|
|
Post by garydavis on Feb 26, 2016 10:37:20 GMT -8
Thanks Bruce...Haven't done any building in a few days. Getting ready for the PORTLAND CLASSIC this Saturday. New Venue for this show..looking forward to going. Are you going to be able to make down to this one? Hope so...it would be great to see you.
|
|
|
|
Post by dogfish7 on Feb 28, 2016 15:05:57 GMT -8
Sorry. Just can't afford it right now, plus I have a cold. Bring back some pics for us.
|
|
|
|
Post by garydavis on Mar 4, 2016 11:19:04 GMT -8
Here's a few looks at the interior floor and tranny tunnel. I took the seat out of the 34 Rod kit and it needs Modified. Now I need to get the firewall and the back wall built...then the bars will go in. Thanks for stop'in by and look'in.... 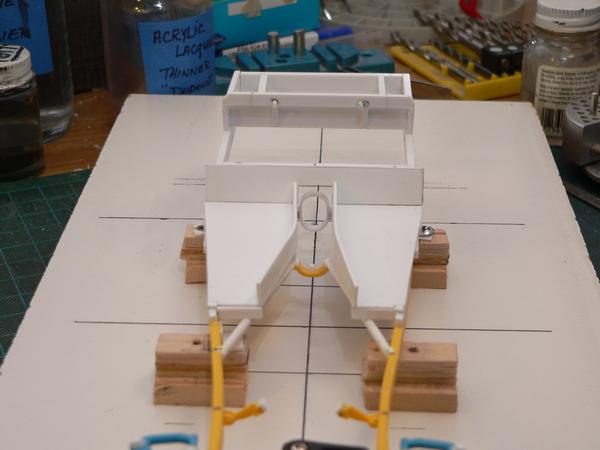 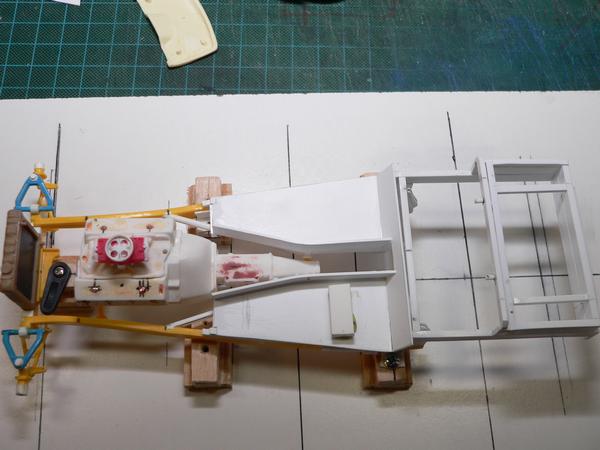 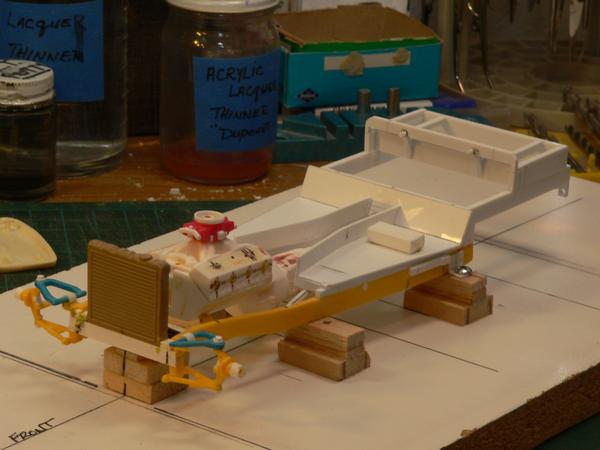 |
|
|
|
Post by garydavis on Mar 5, 2016 16:24:30 GMT -8
Thank you Bobby for the compliment....
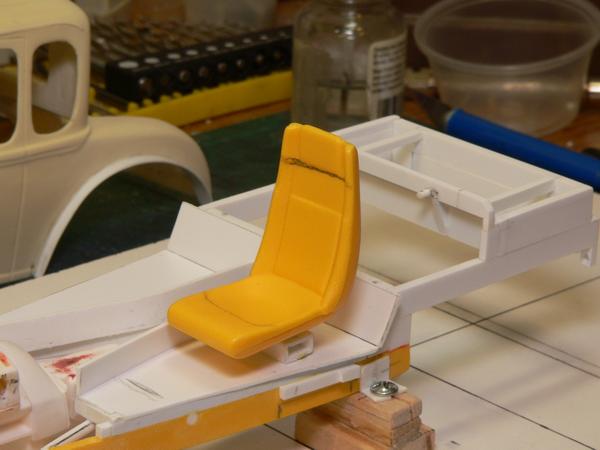
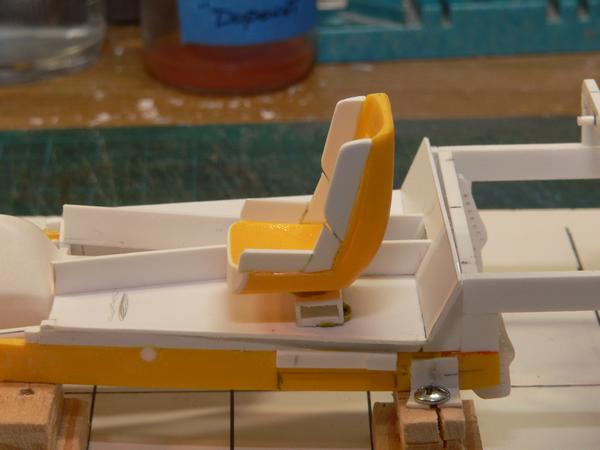
Here's a small update to show that I did build something today...LOL..
I took the seat from the 34 Rod kit and made it into a Racing seat. The seat is in mockup as I just finished with all the fab work. Now...it's sanding to shape time. Here's a few pics for a look...
Thanks for look'in in.....
|
|
|
|
Post by dogfish7 on Mar 6, 2016 14:23:35 GMT -8
Some great updates Gary!
|
|
|
|
Post by garydavis on Mar 8, 2016 12:36:01 GMT -8
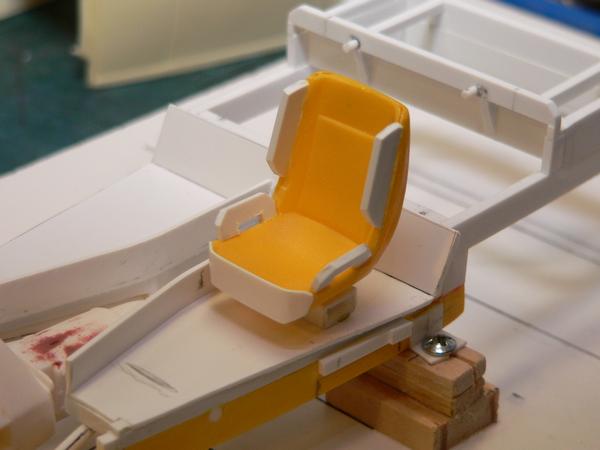
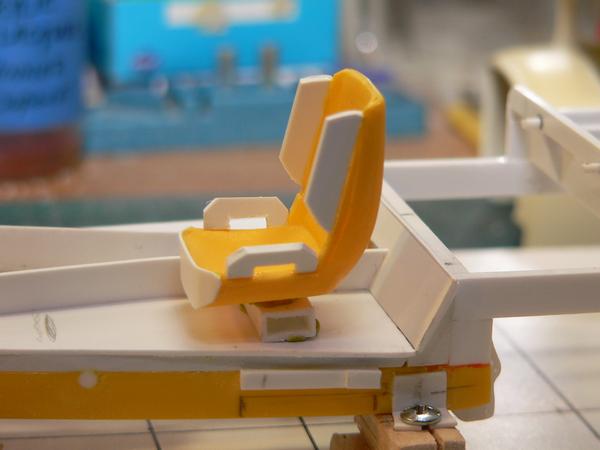
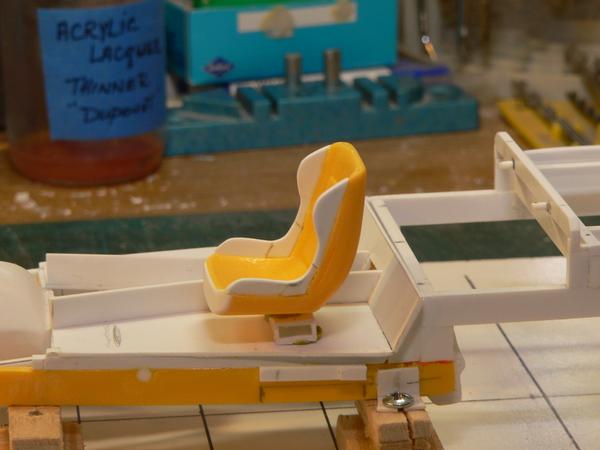
Thanks for the look in Bruce...I changed the side bolsters on the bottom of the seat which I like better. They need to be filled and sanded to shape... Here's a look.....
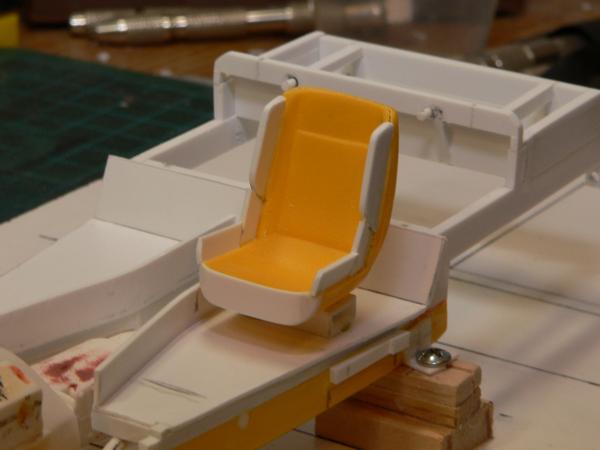
Here it is sanded to shape....

|
|
|
|
Post by garydavis on Mar 14, 2016 15:57:10 GMT -8
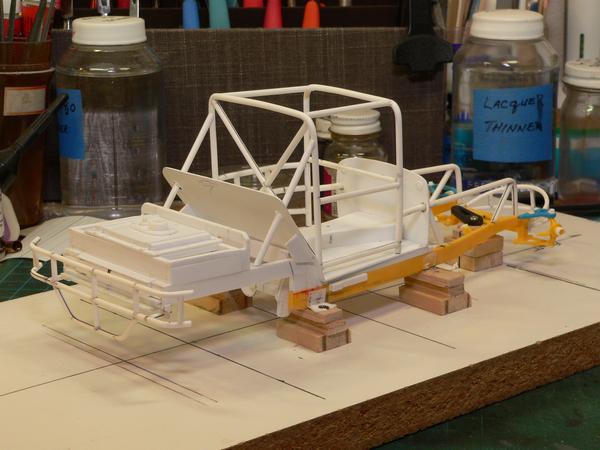
Here's a little progress update....The interior sheet work is finished and Front and Back Hoops are in. The front hoop stress cracked when I put the top bars in with MEK, which of course made them weak. That also means that I didn't heat the rod enough to keep it solid. But...it's an easy fix and I'll do that tomorrow when I put the side and back cross bars in. This whole setup is pinned and will be removable to paint...thanks for stop'in in folks...  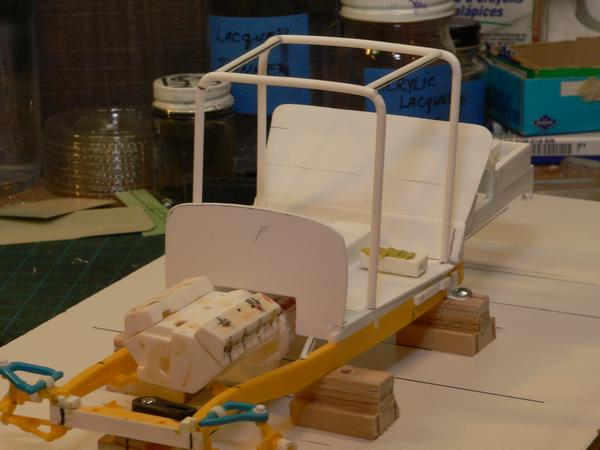 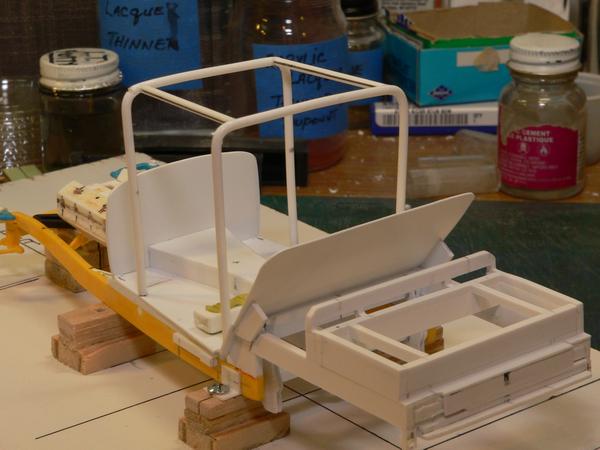
|
|
|
|
Post by dogfish7 on Mar 16, 2016 8:48:48 GMT -8
Very nice work on the seat change and interior sheet work. 
|
|
|
|
Post by garydavis on Mar 23, 2016 13:19:18 GMT -8
Thanks Bruce.....
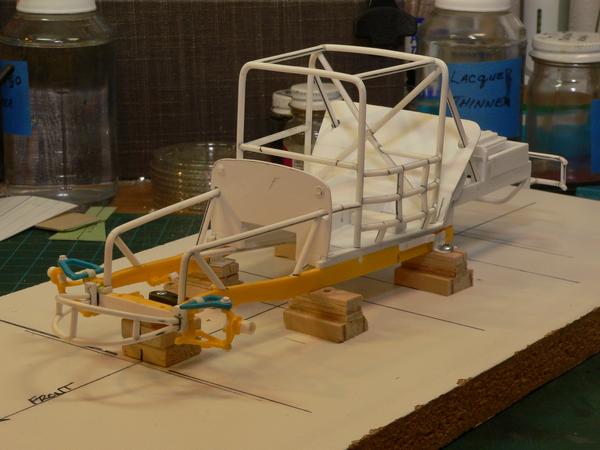
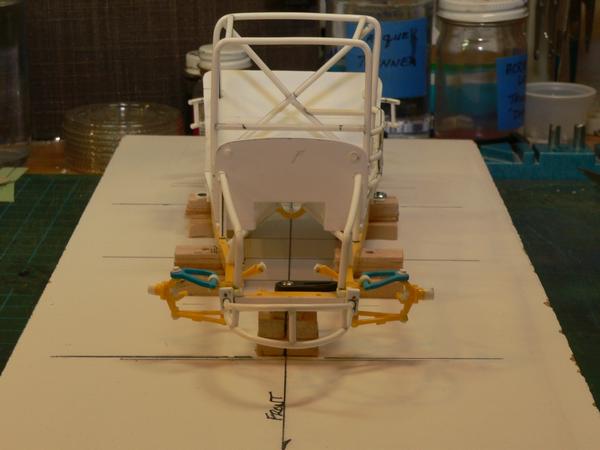
Here's an update....95% of the bar work is complete. The front shock mounts need to be fabbed along with the racing harness mounting points. The Dash also needs to be fabbed along with all the gauges. This chassis is just about ready for primer/paint. Here are a few pics of the bar work....
|
|
|
|
Post by dogfish7 on Mar 26, 2016 11:00:16 GMT -8
Lookin fine there Gary! Still think you should show this build on other forums. This one is all but dead. 
|
|


