|
|
Post by dogfish7 on Oct 25, 2012 8:03:53 GMT -8
Man, that looks good!  |
|
|
|
Post by Bernard Kron on Oct 28, 2012 16:56:03 GMT -8
Thanx Bruce! Progress on this build is slow be steady. I got some Testors Modelmaster No. 2936 Clear Top Coat which is Testors’ only true enamel clear in a rattle can. It seems to have solved the crazing problem I had. I generally use lacquers so I’m unaccustomed to the slow cure time for enamels. I tried polishing an area of my test panel after 24 hours and the paint, while hard enough to stand up to a light polishing , seemed a bit soft so the result was somewhat milky. I’ll give the final coats a good 5 to 7 days before polishing. I created final decal art which required modification of the “Avalon Spcl.” logo to fit properly on the rear panel below the trunk. Otherwise the proof pieces laid out properly. I’ll probably print and apply the decals tomorrow, which means the final clear should go on Tuesday. Final polish and assembly should happen in about a week to 10 days. Meanwhile most of the sub-assemblies have been painted. I decided to give the belly pan a polished aluminum finish. I scored some panel lines into the pan to represent the three panels that would be removable on the 1:1. During final assembly I’ll apply some Dzus fasteners in appropriate places to “secure”” them. I also cut some relief holes along the sides of the bellypan for the exhaust pipes which exit in front of the rear wheels. 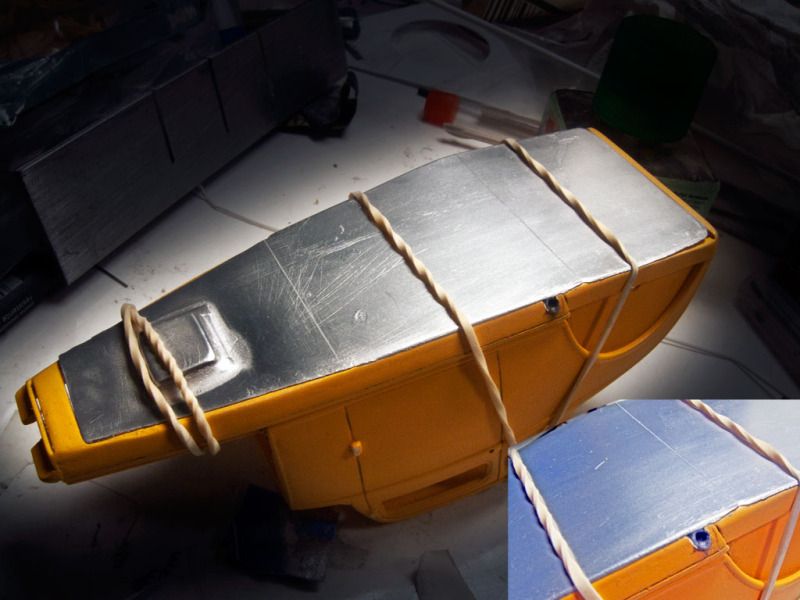 I bought some transparent red acetate for the windows and decided to make a matching see-through grill panel as well. This was a popular thing to do in the late 50’s and early 60’s. Hopefully the front of the blown Nailhead will be visible through the panel on the finished model. (and yes, I will strip and re-finish the grill shell…) 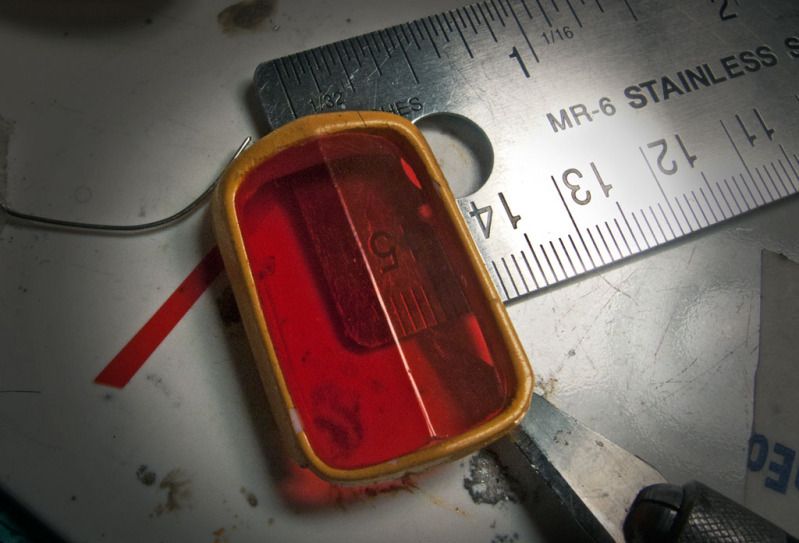 And lastly, most of the interior panels are painted in Metalizer Aluminum Plate with the rill bar done in black semi-gloss. I still have to apply p/e gauges to the dash and fabricate a steering system. Along with some engine wiring and plumbing, this is the only mechanical work left to do on the car. 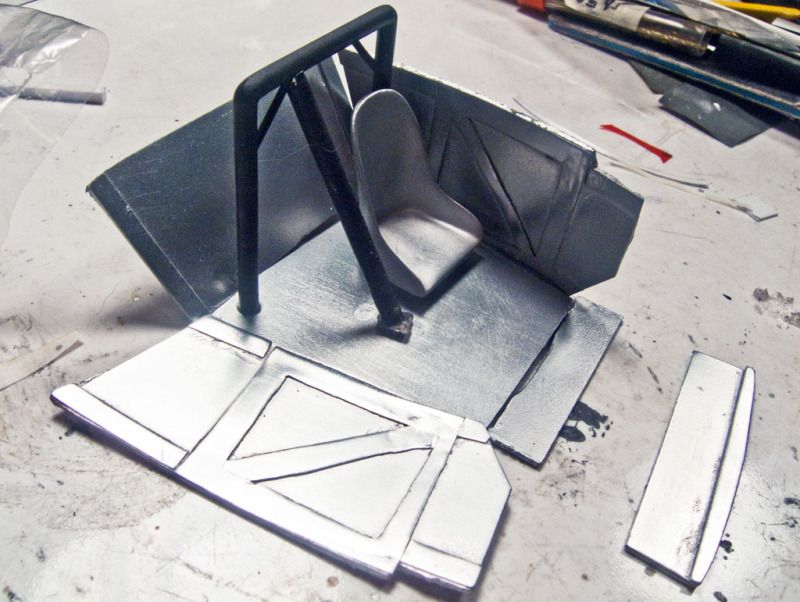 I hope to have this project wound up in about two weeks, barring any late-stage disasters… Thanx for lookin’, B. |
|
|
|
Post by brizio on Oct 29, 2012 5:04:48 GMT -8
Its coming up great!
|
|
|
|
Post by Bernard Kron on Oct 30, 2012 13:06:10 GMT -8
Thanx again! I got the decals and clear succesfully applied. After a few days to cure I'll start final assembly. I'm really looking forward to seeing the impact on the appearance of the red plexiglas windows and grill. Thanx for lookin', B.  |
|
|
|
Post by dogfish7 on Nov 1, 2012 6:24:05 GMT -8
Paint and Cals are awesome B! |
|
|
|
Post by Bernard Kron on Nov 3, 2012 17:10:32 GMT -8
Thanx! The interior is completed and installed. In order to get that done the red Plexiglas windows had to be installed as well. There was a very specific sequence in order to get everything squeezed in. Once the floor is glued in place the interior will largely be invisible due to the mail slot windows and the fairly dark red Plexiglas. The steering wheel is from an AMT ’37 Chevy. Here’s a composite picture of the interior details during final assembly including the firewall which had to be glued in position in order to locate the kick panel. Next stop, final engine detailing and installation, then steering and suspension details. Shouldn’t be too long now… Thanx for lookin’, B. P.S. As I look at this I notice I’ve omitted the shift lever. I’ll install it now since I actually haven’t glued the floor assembly in place. Phew!...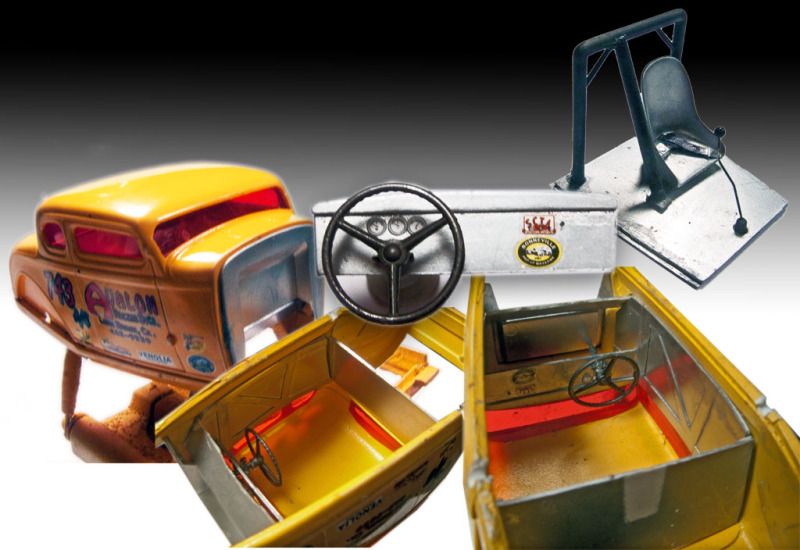 |
|
|
|
Post by garydavis on Nov 4, 2012 10:38:28 GMT -8
This build is really looking good Bernard. I like that color of yellow. The decals really pop against that yellow..
|
|
|
|
Post by brizio on Nov 5, 2012 12:08:34 GMT -8
Very nice! I like too the yellow paint that contrast decals and windows.
|
|
|
|
Post by zbuckster on Nov 6, 2012 13:36:51 GMT -8
What a sweet coupe. Everything about it rocks.
|
|
|
|
Post by Bernard Kron on Nov 13, 2012 22:24:19 GMT -8
Thanks again! I’ve gotten the motor completed and installed and the interior and bellypan installed. The bellypan required some internal bracing to be fabbed to provide adequate glue points so it would sit properly in place. Left still to do prior to final assembly are fabricating and mounting the front suspension and steering details. Below are pictures of the bellypan and motor. Thanx for lookin’, B.  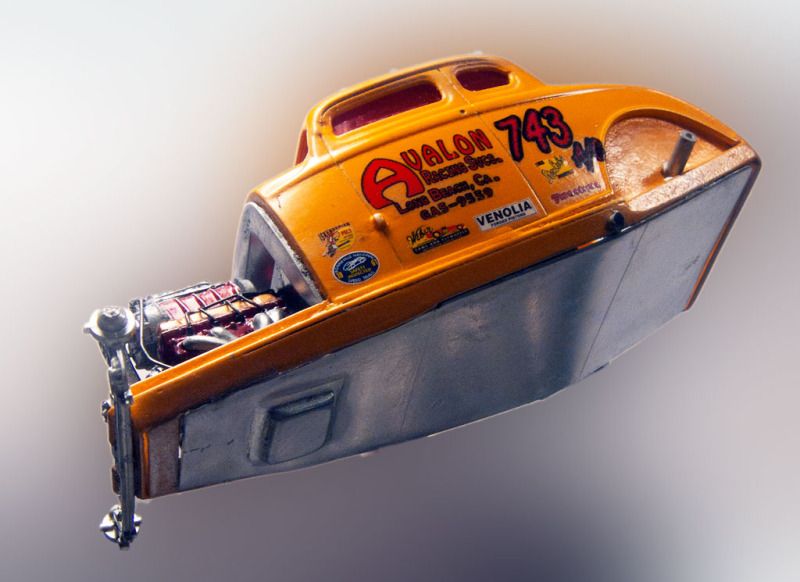 |
|
|
|
Post by brizio on Nov 15, 2012 8:29:16 GMT -8
Nice!
|
|
|
|
Post by Bernard Kron on Nov 16, 2012 9:17:02 GMT -8
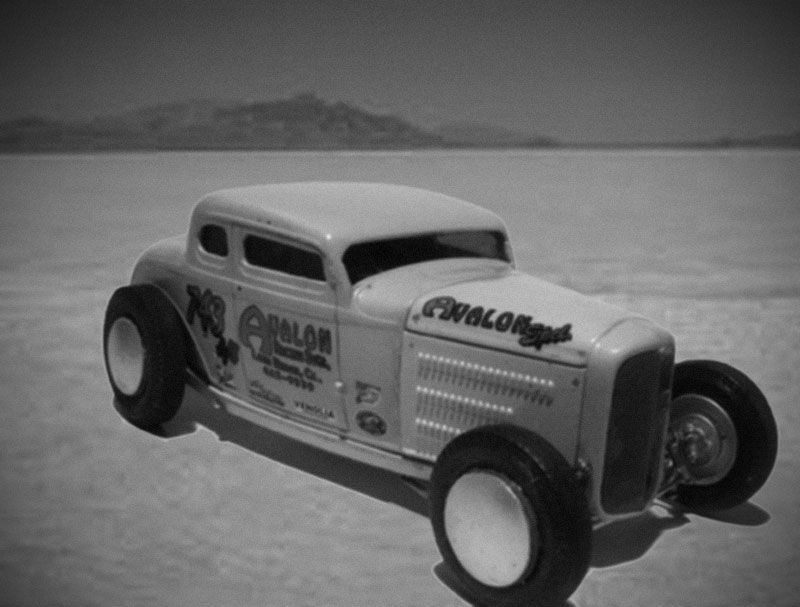
Thanks! As I finish up this build here are some final details. One of the interesting things I learned while working on this car was something about the Buick Nailhead V-8. Apparently if you check out the parts numbers for the heads on this motor you will see the same number for both the left and right head. The two heads are identical. In fact they are symmetric front to rear and side to side. They have water intake/exit ports on both ends, too. So you simply attach either a plug or a connector to the appropriate hole. As is common practice on lakes cars I omitted a radiator. Radiators generate an enormous amount of drag with the air passing through them. Instead LSR style racers equip the cars with a large coolant tank loaded with cold water in a sufficient amount to keep the motor at acceptable temperature for the time the car will be running. As mentioned earlier, on my car I “imagineered” it to have the coolant tank in the rear of the car. So when it came time to rigging up the coolant lines I simply ran rearward facing pipes off the rear of the heads. Of course, with no radiator there is no need for a grill, allowing for a blank panel. In this case I used transparent red “plexiglas” (actually acetate sheet) as also used in the windows. Again, this was a common practice back in the day, and allows for a “peek-a-boo” look at the front of the motor. As I button this car up I have fabricated the steering system for this car from styrene rod and strip. In the composite photo below I’ve included a detail shot of the steering linkage, along with shots of the coolant pipes and the see-through grill panel. I will mount the moon discs to the wheels at the very end to protect the metalizer paint from too much handling. In the shot of the back side of the motor you can also see where I had to cut away the back of the bell housing to clear the firewall and kick panel. Modeling is a world of illusion and this project is no exception! Thanx for lookin’, B. 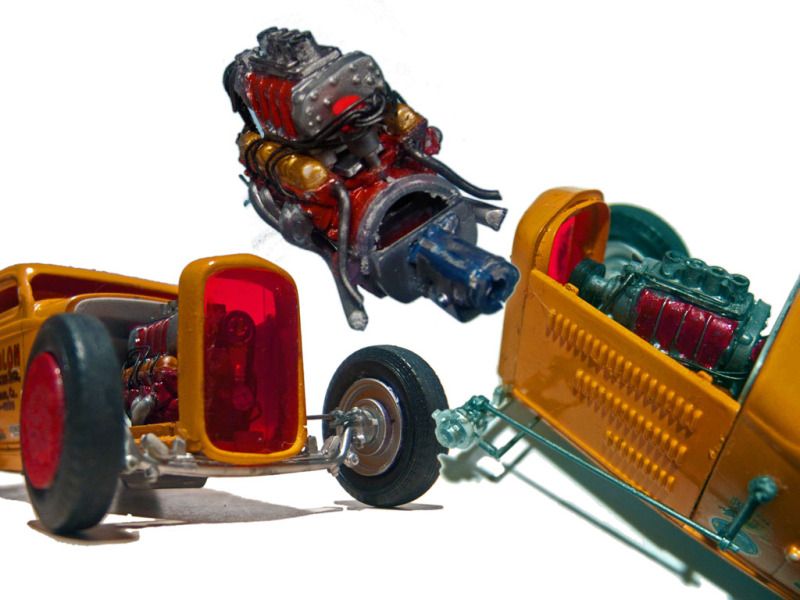 |
|
|
|
Post by Bernard Kron on Nov 16, 2012 17:51:46 GMT -8
|
|