|
|
Post by Bernard Kron on Jul 27, 2012 15:13:06 GMT -8
This is my first 1/4 miler project since late last year. I’ve been building hot rods but now it’s time for some drag machines. My initial build is an early 60’s A/ or AA/Dragster based on a Dragmaster IV chassis. I started with the Revell Mickey Thompson Attempt I kit, removed the second roll hoop, trimmed the rear tin work off the basic body, and swapped the Attempt I’s narrow front axle for a full width unit from a Revell Tony Nancy Double Dragster kit. Power will be a from a Revell Parts Pak blown Pontiac. Tires are pie crust M&H Racemasters courtesy of Ma’s Resin mounted on vintage Halibrands I scored on eBay a while back. Front wheels will be wires from the Tony Nancy kit. I'm really enjoying the detail and intricacy of this kit. Parts fit is surprisingly good. Not as fiddly as some Revell kits from this period. I'm saving the Attempt I's 4-bangers and the wheels and tires for my parts stash. Thanx for lookin', B. Here are some inspiration pics:  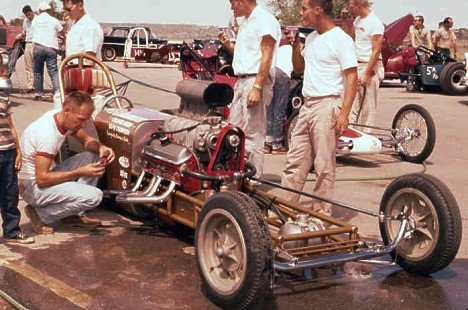   And some pics of the chassis, some of the bodywork and paint, and the rear tires and wheels: 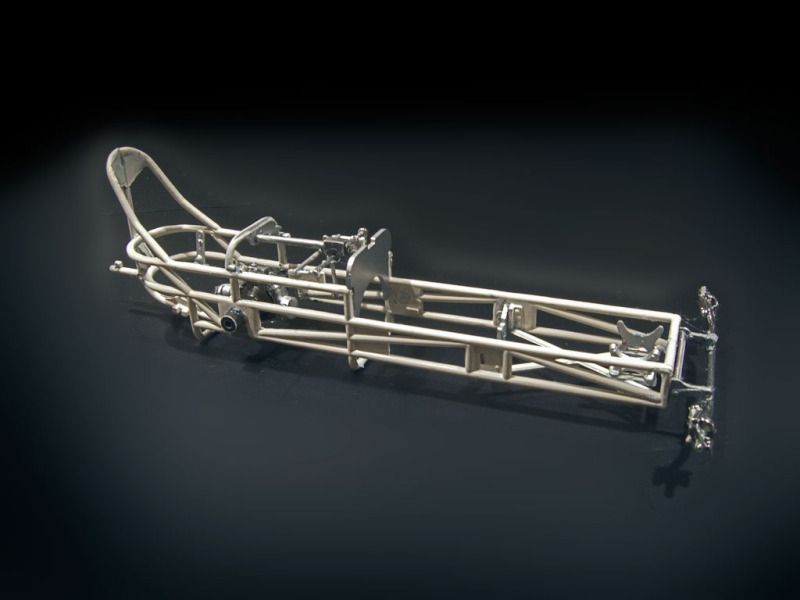 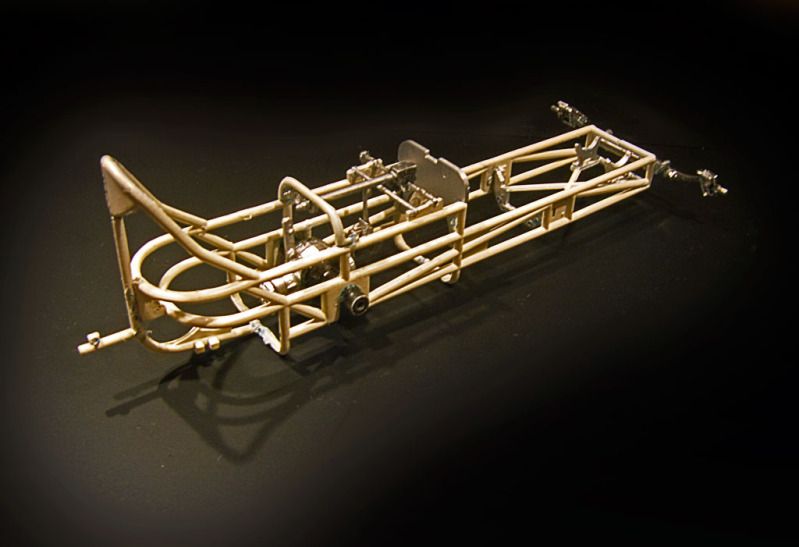 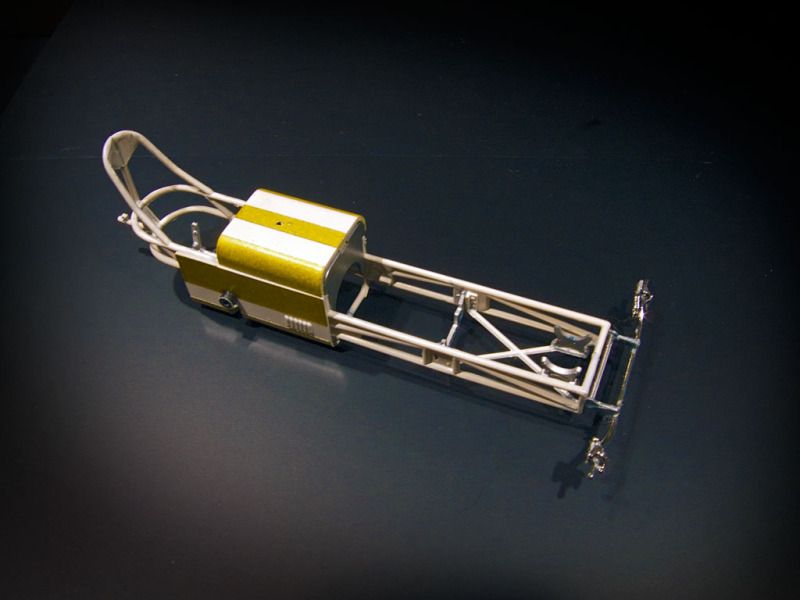 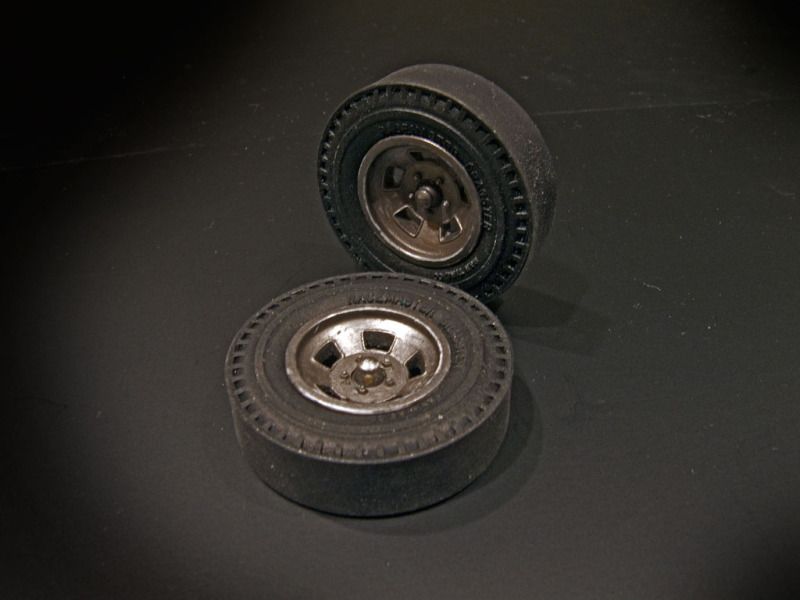 |
|
|
|
Post by zbuckster on Jul 28, 2012 7:15:51 GMT -8
Great start.
|
|
|
|
Post by Bernard Kron on Jul 28, 2012 16:44:40 GMT -8
Thanx Buck! The motor is completed and ready to drop between the rails. As mentioned it’s a Revell Parts Pac 421 Pontiac. The Hilborn scoop and detailed Hilborn fuel pump are courtesy of Altered States Models ( www.alteredstatesmodels.com/ ), the pre-wired magneto a resin piece from Morgan Automotive Detail ( M.A.D. - www.madmodeling.com/store/ ), the in-out box is from a Revell Parts Pac Cadillac motor, the clutch can from the Attempt I kit, and the belt tensioner and fuel distribution block were scratch built. The block and heads are finished in GM engine blue and most everything else was stripped of chrome and finished in various shades of Testors Metalizers. The headers will come from a Revell Parts Pac Chevy. Next steps, engine installation, suspension details, wheel mounting, decals and body installation. I’m going to attempt to keep all the body panels removable to show off the cool chassis. Shouldn’t be too long to completion… Thanx for lookin’, B. 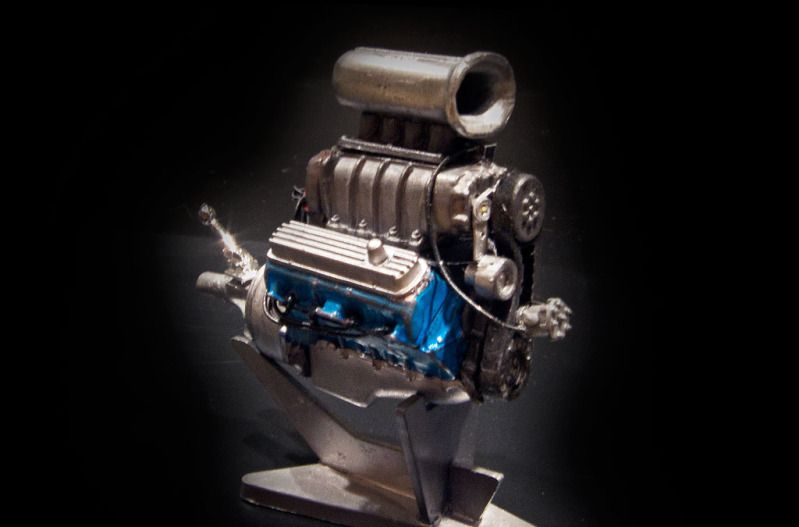 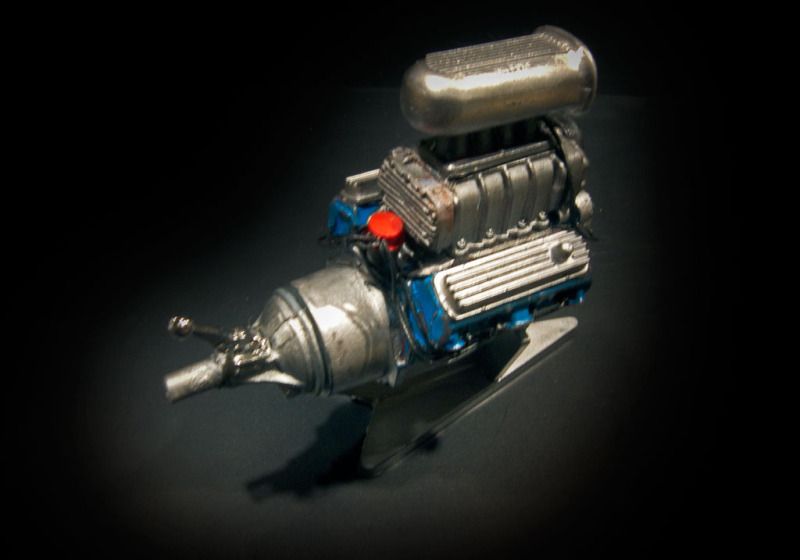 |
|
|
|
Post by brizio on Jul 28, 2012 19:48:05 GMT -8
Nice job!
|
|
|
|
Post by Bernard Kron on Jul 29, 2012 17:23:14 GMT -8
Thanx! I got a few small jobs out of the way today. The headers from the Revell Chevy Parts Pac are installed. I made the art for the Dragmaster Logo decals which will go on the cowl panel with the “Dragmaster” word running along the lower edge of the white stripe on each side. As you will see, I eliminated the red and gold colored bands and filled the white areas in the cartoon character with a tan color. This is so that the decal will not look too busy and so that the figure will read on the clear decal. I can’t print white on my inkjet printer. Lastly, I changed my mind regarding the wire front wheels. As I progressed on this project it got funkier and less shiny, more like the period diggers I modeling, so I switched to 12-spoke Halibrands for a more rough and ready period look. I’ll also tone down the chrome on the headers with some washes during final assembly. Thanx for lookin’, B. Original Dragmaster Logo: 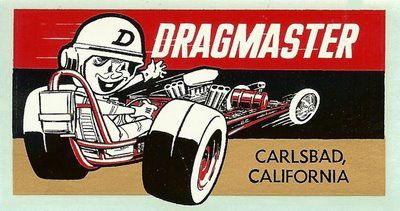 Modified Dragmaster Logo  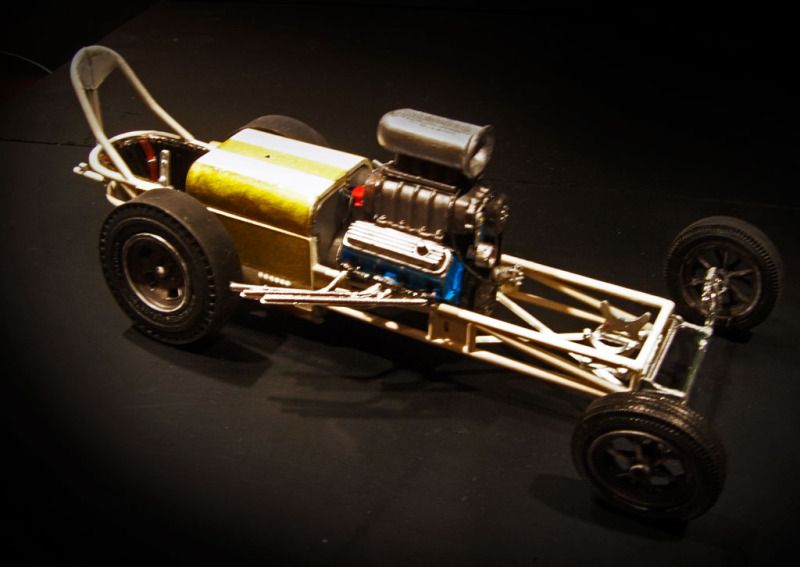  |
|
|
|
Post by zbuckster on Jul 30, 2012 9:06:43 GMT -8
Looking very good. I am just trying to figure out making decals. I have a laser printer and I am dealing with transparence issues. I really like how you by passed the can't print white issue. Thank's for the tip.
|
|
|
|
Post by techman on Jul 30, 2012 16:14:41 GMT -8
 This is REALLY CLASS ONE !!!!!!!!! Just got around to seeing the progress.........AWESOME!!!!!!!!!! I was looking at the old "Mickey Thompson Dragster" (same picture where the car is setting beside the station-wagon) and decided "what to do" with the "second car" in the Double-Dragster Kit, when I was done with the Fiat.......... FANTASTIC JOB !!!!!!!!!!!!!! DJ
|
|
|
|
Post by brizio on Jul 30, 2012 17:50:23 GMT -8
Beautiful job! You are a fast builder!
|
|
|
|
Post by Bernard Kron on Jul 30, 2012 18:32:41 GMT -8
Thanx guys.
People comment on my being a fast builder, but actually I am constantly doing little sub-assemblies of various parts that I have lying around until I have a use for them. An example is the Halibrand 12-spoke wheels. I bought some on eBay and when I got them I tried various tires with them until I found some that looked right and fit properly. These are the little Pirellis that come in the Revell '29 Ford "Rat Rod" RPU and the '31 Ford sedan kits. Then I bagged them up and set them aside. When it came time to use them all I did was paint them and drill them to fit the front axle.
Now John Teresi is a fast builder!!!
Buck, regarding decals I think the important thing is to "pick your battles". Some colors are very weak and don't cover well. Generally I only put decals over lighter colors. We'll see how well the tan color holds up to the lime green under it. I dream of having an Alps or OKI some day...
|
|
|
|
Post by zbuckster on Jul 31, 2012 7:59:52 GMT -8
My laser printer is an Oki C5500. I bought it because the clerk at Stables said it would print white. Plus it was on sale. I don't remember how much but I thought it was a fair price. Any way got it home set it up and it doesn't print white. I was angry at first but then got to the "What the Hell you needed a printer anyway. " So is there an Oki that prints white and I bought the wrong model?
|
|
|
|
Post by Bernard Kron on Jul 31, 2012 20:20:45 GMT -8
My laser printer is an Oki C5500. I bought it because the clerk at Stables said it would print white. Plus it was on sale. I don't remember how much but I thought it was a fair price. Any way got it home set it up and it doesn't print white. I was angry at first but then got to the "What the Hell you needed a printer anyway. " So is there an Oki that prints white and I bought the wrong model? Here's a link to a pretty thorough discussion of the whole issue of the types of printers that can be used to print colors like white, gold, silver, etc. robdebie.home.xs4all.nl/models/decals.htm#models . There's a list of printers further down in the discussion. Your OKI is not among them.  |
|
|
|
Post by zbuckster on Aug 1, 2012 8:11:26 GMT -8
Thanks for the link, that helps a lot.
|
|
|
|
Post by Bernard Kron on Aug 3, 2012 16:20:37 GMT -8
No preblem... This project is finished. Time for a formal photo shoot. I thought I’d take a moment to wrap up with some final details, build notes and comments on the Dragmaster IV and its role in the evolution of the dragster. The Dragmaster IV is the best known of the designs out of the Dragmaster shop owned and operated by Dode Martin and Jim Nelson. The best known of the Dragmaster IV cars is no doubt the Mooneyes dragster, but the most successful was probably Pete Robinson’s ultra-lightweight giant killer which won the 1961 Nationals. The Pete Robinson car: 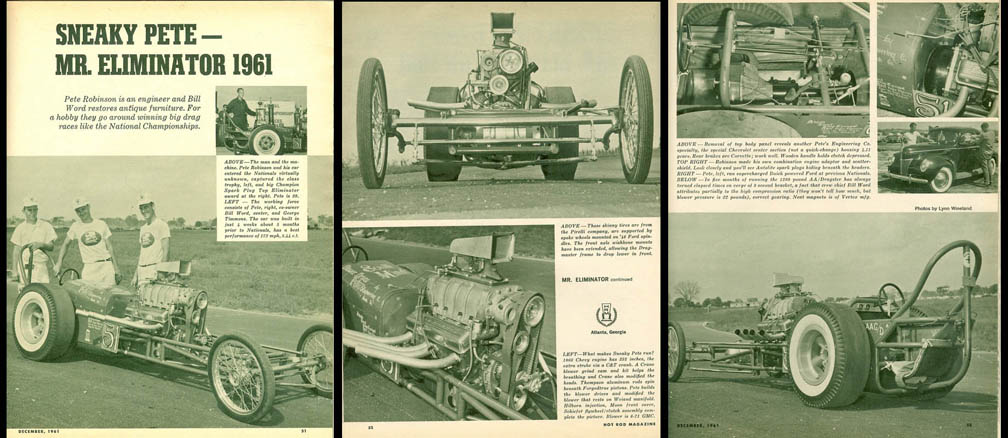 The Mooneyes dragster 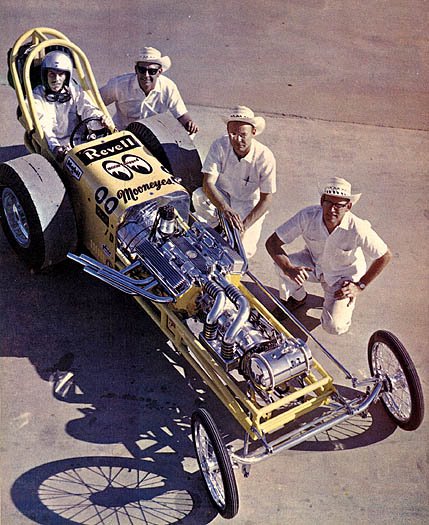 One reason the Dragmaster IV was ubiquitous in the early 60’s is you could actually order a complete race car from them in kit form! 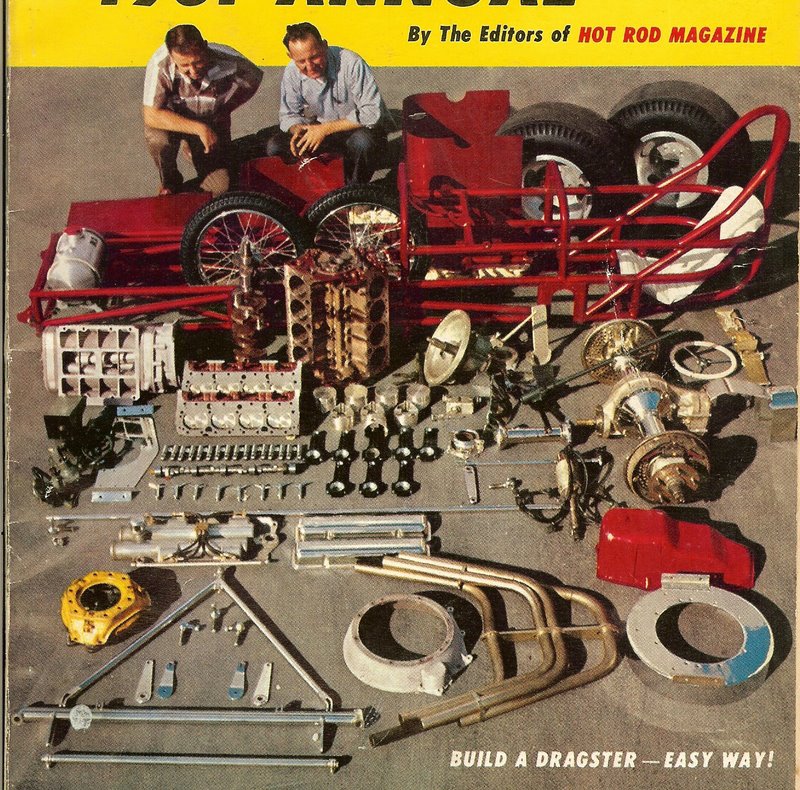 Eventually the Dragmaster IV would be eclipsed by the radically .simplified lightweight designs of builders like Kent Fuller and Don Long. The Dragmaster IV was clearly influenced by the Kurtis Kraft school of parallel tube frame design as seen in the Indy cars of the 50’s and early 60’s, right down to the dual torsion bar front suspension. It’s also unusual in not using split wishbones or hairpins to locate the front axle. Instead they used a single v-shaped wishbone mounted to the center of an x-brace. The Mickey Thompson Attempt I used a narrow front axle to help keep the frontal area down on the streamliner body. In converting the Attempt I to a full-on big-engined dragster I switched the narrow kit axle to a wider one from a Revell Tony Nancy Double Dragster kit. This necessitated fabricating a wider wishbone:  Dragmaster eventually produced a more modern frame design, the Dragmaster Dart, with tapered frame rails, while still retaining the signature Dragmaster roll cage design Here’s a picture of Dode Martin and Jim Nelson with a Dart car in 1962. 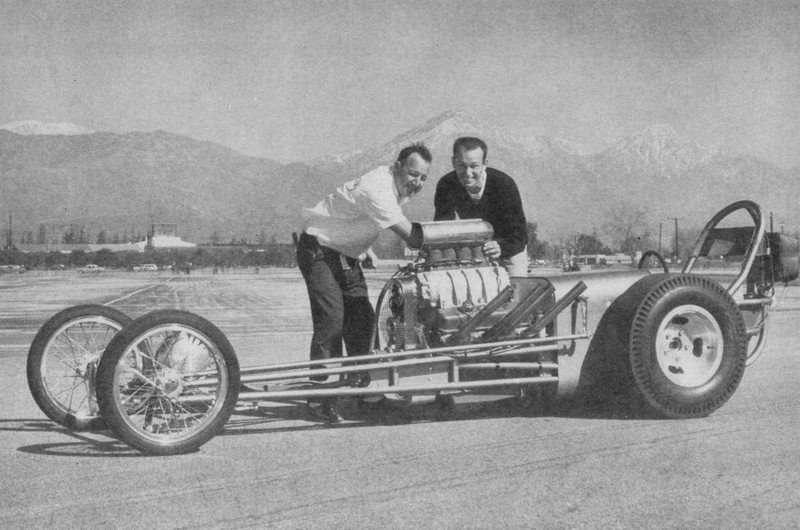 And finally, here are a couple of .photos of the interior showing some of the details of my build: 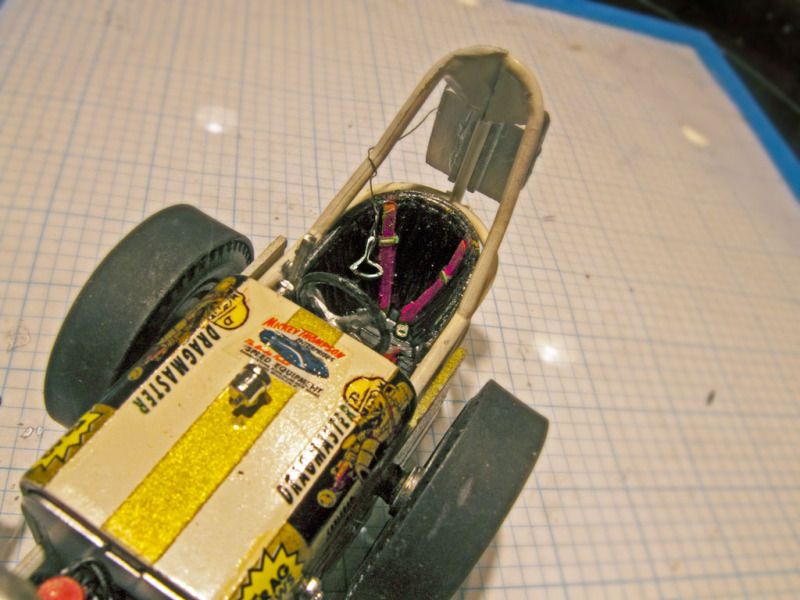 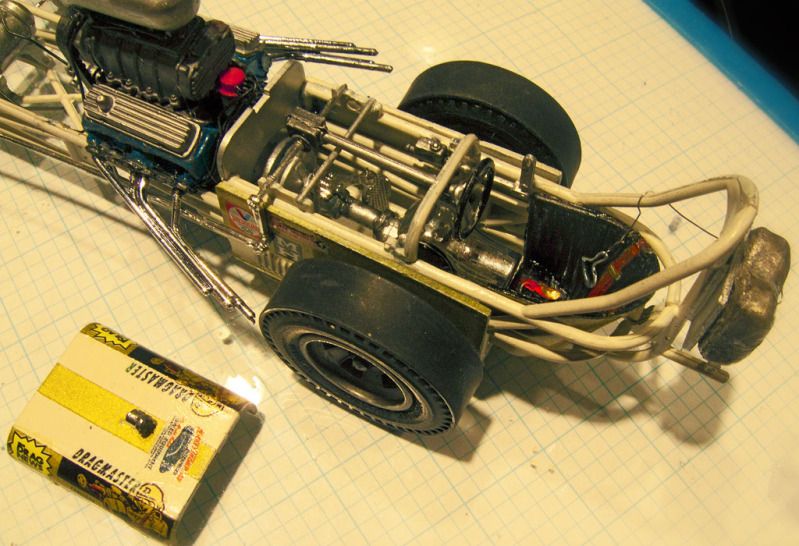 Next stop, the completed builds! Thanx for lookin’, B. |
|
|
|
Post by garydavis on Aug 4, 2012 18:33:16 GMT -8
Very informative and cool build Bernard!
|
|
|
|
Post by techman on Aug 5, 2012 18:29:14 GMT -8
THANKS for takin' the time to "show all the extra detail work" that you did on this one!!!!!!!!!!!!!!! ABSOLUTELY AWESOME!!!!! DJ
|
|


